Wednesday, 8 June 2022

Friday, 1 July 2016

From Marius to Anders

I'd been thinking about making a doll cosplay of Anders from Dragon Age II for a while; Marius, my Dollshe Hound, was the obvious candidate. This meant making a hardcap wig from mohair and making an addition to his face-up in the form of stubble - and a pair of new amber-brown eyes.

Marius with new eyes and stubble wearing temporary wig

Gold hoop earring added
Further shading and blushing added to face-up; wearing the hardcap mohair wig


The next stage will be to finish making his outfit, including the feathered coat. At this point though, Marius has pretty much ceased to be Marius and is now Anders. :-)

Friday, 16 January 2015

And then there were 17!

For my combined birthday/Christmas present, my partner bought me a 62cm female Mirodoll body in Normal yellow skin, and it arrived yesterday. So Galhaia, my CP Juri 2005 girl, got upgraded to a taller resin body that matched her resin better than the Obitsu 60 body she's been on for nearly ten years - over that time, her resin has yellowed more than the vinyl body had so it was no longer a good match for her. It's a perfect match for Seraphina, my modded CP Sleeping Soony girl however - so Seraphina got a body and Galhaia got an upgrade! Add to that little Autumn, the tiny 14cm tall ABS Hujoo girl I got back in November, and that brings my tally now to 17 complete dolls and no floating heads!

First, Galhaia on her new body, looking quite regal:


Galhaia (CP Juri 05 on Mirodoll 62cm body)
 Seraphina on the Obitsu body:
Seraphina (modded CP Sleeping Soony on Obitsu 60cm body)

Seraphina and Galhaia together, illustrating the difference in height between the Obitsu body and the Mirodoll 62cm body:
Seraphina and Galhaia

Seraphina reunited with her sister Ayame (Volks FCS F-22):
Seraphina and Ayame


And Galhaia with her partner Marius (Dollshe V2 Hound):
Marius and Galhaia
 

And a family shot of Marius, Galhaia and their little daughter Sophie (Bambicrony Kumi):
The family together

And finally introducing tiny little Autumn (Hujoo Suve)!
Autumn (Hujoo Suve)
 
The tribe is getting very large and I'm running out of room on top of the piano for them all! But at least Seraphina and Christine (CP Lishe) are no longer having to share the same body any longer. :-)

And here's a shot of the whole line-up - all 17 dolls as of January 2015:

Tuesday, 7 October 2014

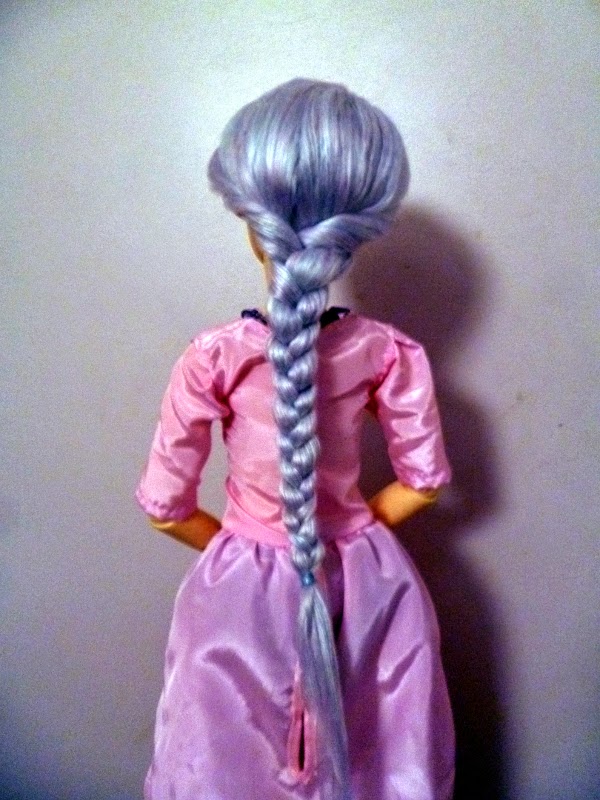
Experiments in hard cap wig-making

I've been experimenting with making a hard cap wig recently, and these are the results of my first try. I used Cygnet Double Knitting yarn in shade 146 M. O. Pearl for the weft and Mod Podge for the glue.

I made it to fit Christine, my Lishe. The main difference between hard cap wigs and other normal doll wigs is that the hard cap is made to fit the doll precisely.

The method I used is similar to papier mache, only using small strips of cotton with Mod Podge Matt, a water-based PVA and acrylic varnish glue that dries to a clear matt finish. The finished cap fits very snuggly onto Christine's head and cannot be easily dislodged - I can hold her upside down and shake her, and the wig stays put.


I made a centre parting for the wig by cutting out a small slit then inserting wefts into the slit, gluing to the underside of the cap before folding over the top. Once all the glue had dried, I then glued more cotton fabric over the slit to hold it tightly closed so it would keep a good fit.

I finished off by styling the wig into a simple braid.


View from the back. The Cygnet yarn was separated out, carded, brushed and then ironed smooth; it results in a wonderfully soft "hair" with gorgeous pastel colours.


I shall shortly be posting a tutorial on how to make a hard cap wig using jersey fabric and saran hair - watch this space!

Thursday, 2 October 2014

I've updated the Doll List with the addition of Seraphina, my modded Sleeping Soony, and updated all the photos.

Seraphina was a new acquisition over a year ago in July 2013. The original Seraphina was an Obitsu 60cm vinyl doll:


I've kept the face-up on the "new" Seraphina as faithful to the original as possible whilst also keeping it with a similar feel to Ayame's face-up in terms of soft lines and pastels:


Expect to see more of the two sisters - Ayame and Seraphina - together very soon!

Back from Hiatus!

I've been away from the doll hobby for almost 2 years due to various RL things going on that took my attention away from dolls. I've had very little time to do anything doll-related, although there's been a couple of changes - Amelie got a new face-up to become the resin incarnation of Ayame, my first-ever BJD (originally a 60cm Obitsu) and there's been one new addition to the line-up; I finally acquired a NS CP Sleeping Soony head that's been modded to open eyes, and she's become the resin form of Ayame's sister Seraphina (who was also a 60cm Obitsu).

I've fixed the photo links to my court shoes tutorial (I lost the hosting for my website arkady.org.uk which broke the photo links) and it's now up as a creation on my Patreon account. You can sponsor me on Patreon from as little as $3 a month, and I'm going to be posting exclusive content there including tutorials for face-ups and period costumes, possibly also patterns for doll clothing that only my sponsors will have access to.

I hope to be a lot more active here from now on, as scaling back on a lot of commitments elsewhere means I can devote more time to hobbies including BJDs. I'm sorry for being away so long, but I'm back now!

Monday, 21 January 2013

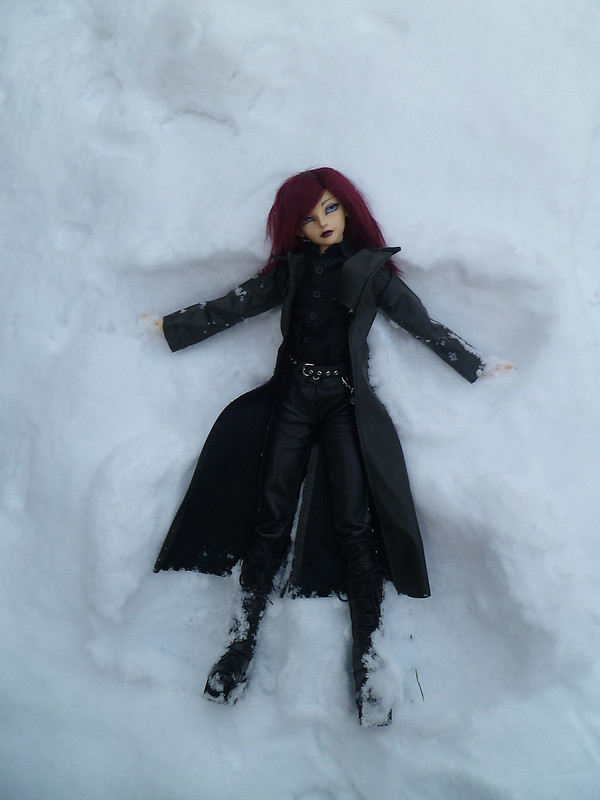
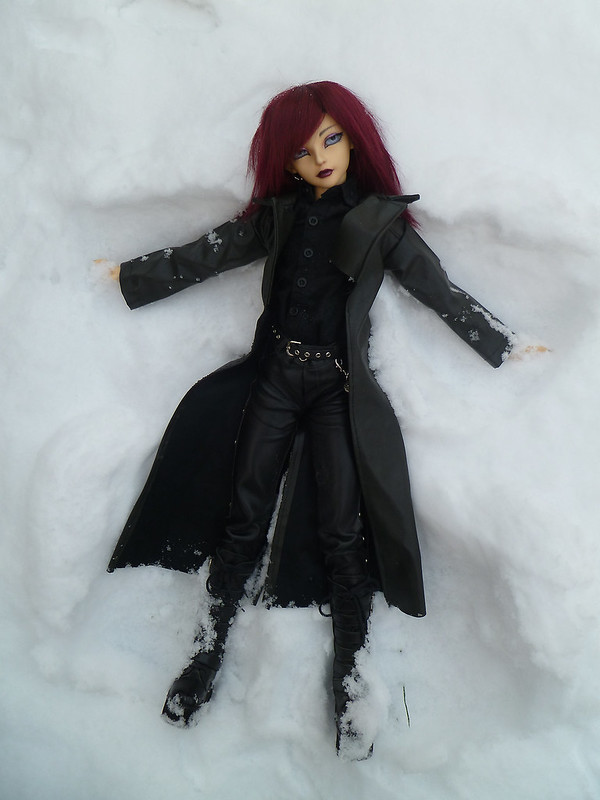
Kai in the Snow

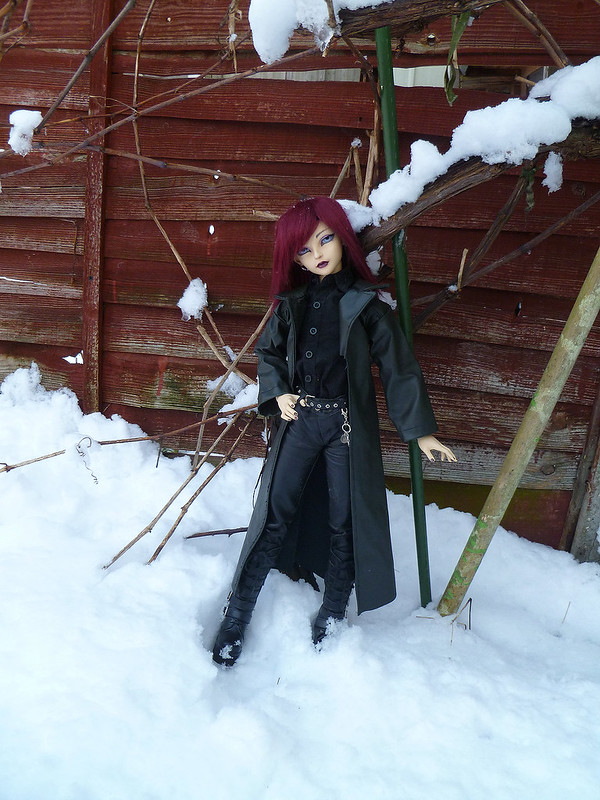
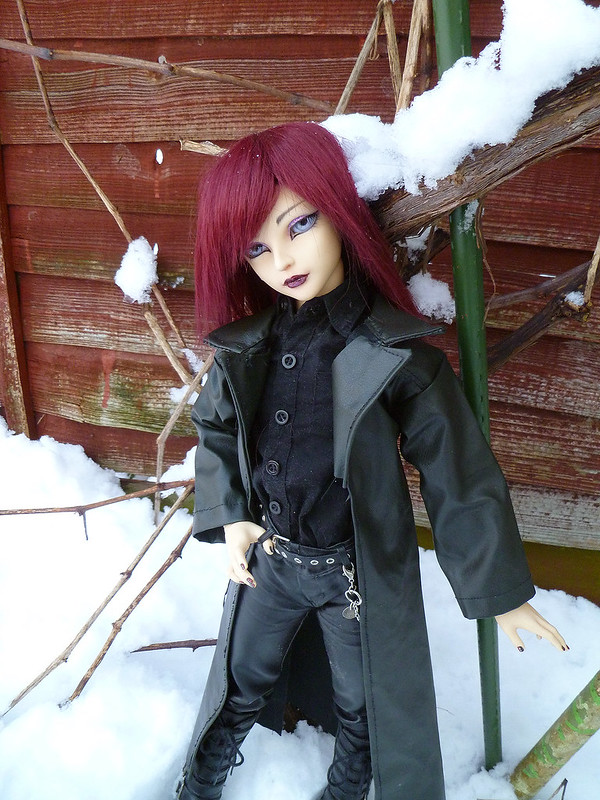
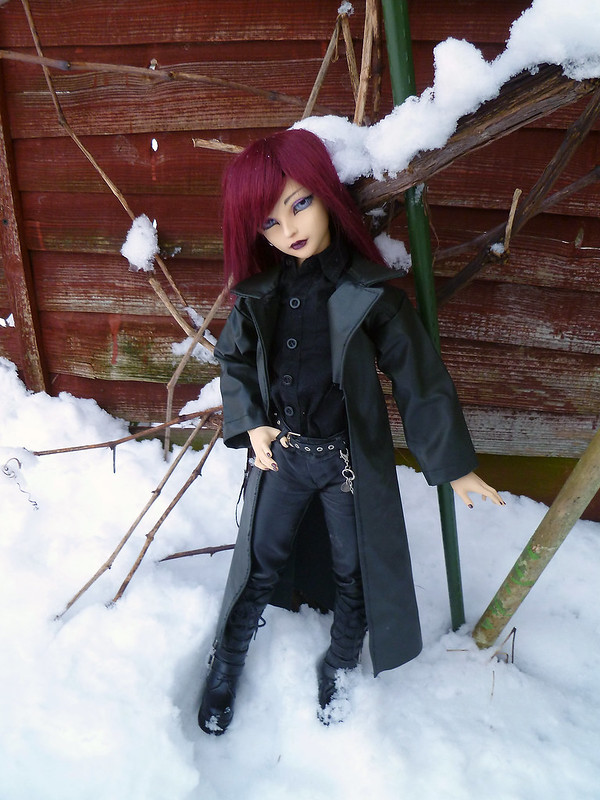
It's the 4th anniversary of Kai's arrival. To celebrate, he got to spend some time in the fresh virgin snow in our back garden - the first "doll in snow" pics I've taken since we moved to the new house about 18 months ago. So of course, he had to make a snow angel. :)


Monday, 11 June 2012

4 Corsets/Bustiers for SD on ebay

Dusky Rose Corset


A handsewn overbust corset in dusky rose satin with a pale pink Warwick brocade front panel, adorned with silver thread topstitching along the seams, trimmed with a pink ribbon rose and lined with pale pink satin. Rear-lacing with a thin silk ribbon through five pairs of pale pink eyelets.
Starting price: £12.50 BIN: £20
Auction ends 18 Jun, 2012 20:45:59 BST (UK)
Click for ebay link


Lilac Bustier/Corset


A handsewn 8-panel overbust corset-style bustier in lilac Warwick brocade, adorned with purple silk trim. Rear-lacing with a thin silk ribbon through five pairs of eyelets and lined with white tone-on-tone floral print cotton.
Starting price: £12.50 BIN: £20
Auction ends 18 Jun, 2012 20:55:24 BST (UK)
Click for ebay link


Purple Velvet Corset


A handsewn 7-panel overbust corset in purple velvet with front centre panel of patterned lilac satin, adorned with purple silk trim. Rear-lacing with a thin silk ribbon through six black coated stainless steel hoops and lined with white tone-on-tone floral print cotton.
Starting price: £12.50 BIN: £20
Auction ends 18 Jun, 2012 21:07:04 BST (UK)
Click for ebay link


Snowflake Bustier top (Reduced price due to imperfection)


A 7-panel overbust bustier in alternating royal blue and navy glittered cotton featuring a centre front panel adorned with silver print snowflake motif, adorned with silver machine-embroidered embellishment at top and bottom. Rear-lacing with a thin silk ribbon through alternating pairs of purple and blue eyelets and lined with white cotton. Slight imperfection in top silver machine embroidery hence low starting & BIN prices.
Starting price: £7.50 BIN: £12
Auction ends 18 Jun, 2012 21:24:50 BST (UK)
Click for ebay link

Wednesday, 16 May 2012

Perseus: Caught in the Light


After a hiatus from the hobby for about a year, it seems Perseus is the doll to draw me back in again.  His new face-up has inspired me to take photos of him; it feels like I've fallen in love with him all over again. Like the rest of my little resin tribe, he is now an example of the best of my work after 7 years of pracice, rather than being one of my first.

Sunday, 13 May 2012

Perseus Renewed


I've owned Perseus for 6 years now - it was his anniversary last month - and had never updated his face-up since I first did it back in April 2006. As I had to redo Marius' face-up anyway (I had him in my arms when I had a seizure in the street a couple of months ago and his nose got chipped, neccessitating some careful sanding and reshaping), I figured I might as well redo Perseus.

I'd been putting it off as, whilst my face-up skills are far superior these days, I was still nervous of wiping his old, familiar and very much loved face and not being able to make him Perseus. But whilst the new look isn't quite the same, it's undoubtedly him, thankfully!


Saturday, 3 December 2011

Commission: Rose Corset for LuWen boy

Rose Corset - custom commission
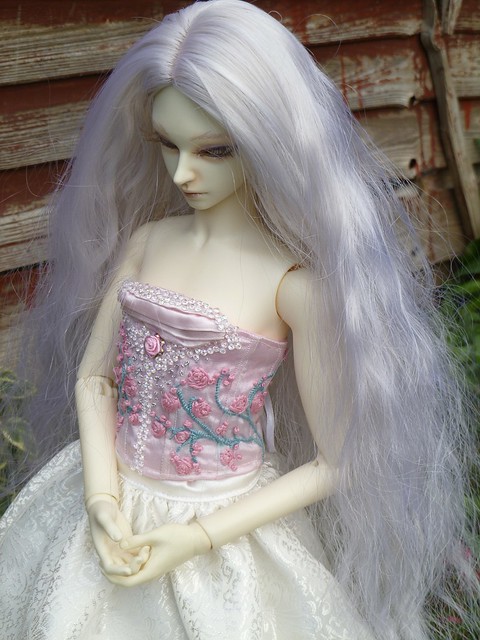
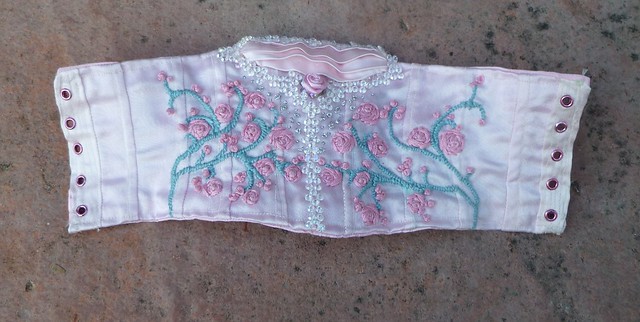
This weekend I finished a special custom commission; a ten-panel corset for a Luts Type 2 boy - a LuWen. From drafting the pattern to fixing the last eyelet, it took about 7 hours' work in total, including hand-embroidering every singe rose.


The corset is sewn from pale pink satin overlaid with pink crystal organza and lined in taffeta. It is embroidered in silk thread with a design of roses, embellished with diamante trim and French knots worked in silver thread, adorned with  pink satin ribbon rose. Pink satin pleating forms the bust, and it laces up the back with a white satin ribbon through five pairs of metallic pink eyelets.


This was a custom one-off commission, but a similar custom embroidered corset - for either male or female doll - would be about £45 depending on fabrics used & the complexity of the design. I can also make matching shoes and other garments and am happy to discuss commissions.

Friday, 22 April 2011

Sunday, 27 March 2011

Tutorial: Court shoes for BJDs

In this tutorial I will be covering how to make a pair of court shoes for a BJD. My model is Amelie, my Volks Syo SD-13 girl with heel feet, but the techniques used are applicable to pretty much any BJD capable of wearing shoes with a heel.


Supplies: White PVA or clear all-purpose glue, outer fabric for upper (here I'm using pink silk Warwick brocade - a 25cmX25cm square will make one pair of shoes), lining fabric (white-on-white floral print cotton), cardboard insole & sole pieces - four for each foot (trace around doll's foot then cut out from sturdy card), insole fabric (cut 2 from lining fabric about 5mm larger all round than the cardboard insole) and leather sole (cut 2 from leather or pleather the same size as the insole fabric). You will also need needles for fabric and leather/pleather, thread, scissors, 4-6 clothes pegs and a few elastic bands or small hair elastics.


Take 2 cardboard insole pieces. Glue them together then, whilst the glue is still wet, place them against the sole of doll's foot, strapping them in place with 2 hair elastics as shown above. Pegs are useful to help keep the toes in place whilst the glue is drying. Repeat with the other foot, then set aside until the glue has dried. Set aside these two insoles, then repeat with the remaining 4 cardboard soles until you have 2 pairs of shaped soles. These will be the soles and insoles of the shoes.


Now glue the leather/pleather soles to one set of card soles, and the lining insole fabric to the other set. You may find pegs come in handy to hold the leather to the card whilst the glue dries.


Make a pattern for the upper by draping a piece of kitchen towel over your doll's foot and marking on it where you want the upper edge of the court shoe to come around the foot. Then draw around where the base will come, and add on an additional 1cm all round to allow for gathering under the sole of the foot. Cut out the pattern then trace around it onto a piece of paper. This will be your template for the fabric upper; you can see mine in the photo above. One side of the template should be a little thinner than the other; this will be the instep side that faces the arch of the foot. Cut out 2 from the brocade, reversing it for one, and 2 from the lining fabric (again reversing the template for one). Stitch the heel on each piece then sew the linings to the outer uppers so you have a completed upper as shown above. Check for fit on the doll's feet.


Take one of the fabric-covered insoles, and sewing a simple running stitch around the edge of the fabric. Gather it so the fabric folds over the card, then lace the thread back and forth across the underside of the insole as shown.


Stitch a simple running stitch around the outside edge of the left upper, then place it on your doll's foot, then place the left insole against the sole of his/her foot. (Disregard any alarmed glances they may give you at this point.) Pull the gather stitches on the upper tight so it closes over the edge of the insole then lace the edges together across the insole as shown. Repeat with the right foot.


It's now starting to take shape and look like a shoe. Rather than settle for a plain court shoe, I decided I wanted to have a tongue at the front of Amelie's shoes; I made this by tracing around the main toe area and making a "cap" for the front of the shoe that incorporated a tongue. The top part of the tongue is lined with a small rectangle of lining fabric. I then stitched the cap to the front of the upper before sewing the line of gathering stitches. This results in a stiffer toe area which holds the shape better, incidentally.


Now take one of the sole pieces, and start lacing the edges of the leather/pleather tightly over the inside of the sole as shown. Make sure you pull the thread tight and keep the stitches fairly close together around the toe and heel areas to eliminate any sharp bumps around the curve. I recommend using a stout button thread for this, but a double thickness of a good strong cotton will also suffice. Repeat with the other sole.


Spread a generous layer of glue over the inside of the sole, then press firmly against the cardboard underside of the insole. Clamp in place using hair elastics and pegs then repeat with the other foot. Leave to dry for a few hours until the uppers and insoles are firmly bonded to the soles and dry.


View of the underside showing how the curve of the arch is held firmly in place against the foot by the hair elastic. A peg on the toe works very well to clamp upper and sole together at that point.


Now it's time to make the heel. There are various options at this point; you could carve one from a lightweight wood, mould one from Fimo or Sculpy then bake it, or you can make one from card. I've opted here for the latter. I've made two tapered cones from card that are flattened on one side into a D shape. Place them against the sole of the shoe to check height and fit.


Cut two little D shapes out of card and glue them into the smaller end of the heels.


To increase the strength of the heels I've filled them with glue from a hot glue gun; you could also use an airdrying clay such as Milliput or use Plaster of Paris.


Once firm and dry, coat the outside of the heels in glue then cover with fabric. I've chosen to use more of the same pink brocade that I used for the uppers, but you could also use more of the same leather or pleather used for the sole, depending on preference. Use pegs to hold the facric in place whilst the glue dries.


Here you can see the shoes and the heels drying. I decided to add a diamante buckle and a couple of dusky pink satin ribbon roses to each shoe. After decorating them I then added a touch more glue to the toe and heel areas and clamped them with the clothes pegs before leaving them to dry.


Once the heels are dry, trim the fabric at each end to about 3-4mm beyond the ends. Make short vertical cuts around the top and bottom edges so you can fold the fabric flat against the top and bottom of the heel. Spread glue over the bottom (small) end of one heel, then fold over the flaps against the bottom. Spread a little more glue over the top then press firmly down onto a piece of leather/pleather; this will be the heel cap. Clamp in place with a peg. Do the same with the other heel then leave to dry.


Here Amelie models the almost-complete shoes; all they lack is the heels.


Once the heels are completely dry, trim away the excess leather/pleather around the heel. Now spread glue over the top of the heel and, as before, fold over the fabric flaps to lie flat over the top of the heel. Spread more glue over the flaps then press the heel firmly against the sole of the shoe, placing it carefully so the shoe will balance and the doll be able to stand upright in the shoes.


Repeat for the other shoe then leave to dry; I find the best way to do this is to either set the doll in a stand, wearing the shoes, so the doll's weight downwards will provide the necessary pressure for a good strong bond or, if you don't have a stand, just sit the doll upright on a pile of books or a box, and place a heavy book on his/her knees. Leave for a few hours until the glue has completely dried.


And there you have it - one pair of court shoes for your doll!

These techniques are how actual human shoes are made, with the exception that heeled shoes for humans incorporate a shank (usually steel) into the arch of the sole to provide support to the instep and strengthen the shoe to withstand the rigours and stress of wear and walking. Doll feet don't need support however and doll shoes are not subjected to the same wear and tear so a shank can be safely omitted. Also, instead of shaping against an actual human foot, shoemakers use a wooden form called a "last". When making doll shoes, you can use the doll itself or a spare pair of feet as lasts.