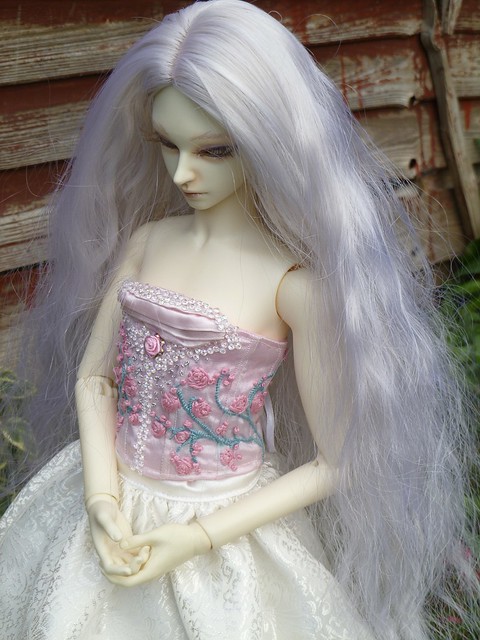
In this tutorial I will be covering how to make a pair of court shoes for a BJD. My model is Amelie, my Volks Syo SD-13 girl with heel feet, but the techniques used are applicable to pretty much any BJD capable of wearing shoes with a heel.
Supplies: White PVA or clear all-purpose glue, outer fabric for upper
(here I'm using pink silk Warwick brocade - a 25cmX25cm square will make
one pair of shoes), lining fabric (white-on-white floral print cotton),
cardboard insole & sole pieces - four for
each foot (trace around doll's foot then cut out from sturdy card),
insole fabric (cut 2 from lining fabric about 5mm larger all round than
the cardboard insole) and leather sole (cut 2 from leather or pleather
the same size as the insole fabric). You will also need needles for
fabric and leather/pleather, thread, scissors, 4-6 clothes pegs and a few
elastic bands or small hair elastics.

Take 2 cardboard insole pieces. Glue them together then, whilst the glue is still wet, place them against the sole of doll's foot, strapping them in place with 2 hair elastics as shown above. Pegs are useful to help keep the toes in place whilst the glue is drying. Repeat with the other foot, then set aside until the glue has dried. Set aside these two insoles, then repeat with the remaining 4 cardboard soles until you have 2 pairs of shaped soles. These will be the soles and insoles of the shoes.
Now glue the leather/pleather soles to one set of card soles, and the lining insole fabric to the other set. You may find pegs come in handy to hold the leather to the card whilst the glue dries.

Make a pattern for the upper by draping a piece of kitchen towel over your doll's foot and marking on it where you want the upper edge of the court shoe to come around the foot. Then draw around where the base will come, and add on an additional 1cm all round to allow for gathering under the sole of the foot. Cut out the pattern then trace around it onto a piece of paper. This will be your template for the fabric upper; you can see mine in the photo above. One side of the template should be a little thinner than the other; this will be the instep side that faces the arch of the foot. Cut out 2 from the brocade, reversing it for one, and 2 from the lining fabric (again reversing the template for one). Stitch the heel on each piece then sew the linings to the outer uppers so you have a completed upper as shown above. Check for fit on the doll's feet.

Take one of the fabric-covered insoles, and sewing a simple running stitch around the edge of the fabric. Gather it so the fabric folds over the card, then lace the thread back and forth across the underside of the insole as shown.
Stitch a simple running stitch around the outside edge of the left upper, then place it on your doll's foot, then place the left insole against the sole of his/her foot. (Disregard any alarmed glances they may give you at this point.) Pull the gather stitches on the upper tight so it closes over the edge of the insole then lace the edges together across the insole as shown. Repeat with the right foot.
It's now starting to take shape and look like a shoe. Rather than settle for a plain court shoe, I decided I wanted to have a tongue at the front of Amelie's shoes; I made this by tracing around the main toe area and making a "cap" for the front of the shoe that incorporated a tongue. The top part of the tongue is lined with a small rectangle of lining fabric. I then stitched the cap to the front of the upper before sewing the line of gathering stitches. This results in a stiffer toe area which holds the shape better, incidentally.
Now take one of the sole pieces, and start lacing the edges of the leather/pleather tightly over the inside of the sole as shown. Make sure you pull the thread tight and keep the stitches fairly close together around the toe and heel areas to eliminate any sharp bumps around the curve. I recommend using a stout button thread for this, but a double thickness of a good strong cotton will also suffice. Repeat with the other sole.
Spread a generous layer of glue over the inside of the sole, then press firmly against the cardboard underside of the insole. Clamp in place using hair elastics and pegs then repeat with the other foot. Leave to dry for a few hours until the uppers and insoles are firmly bonded to the soles and dry.
View of the underside showing how the curve of the arch is held firmly in place against the foot by the hair elastic. A peg on the toe works very well to clamp upper and sole together at that point.
Now it's time to make the heel. There are various options at this point; you could carve one from a lightweight wood, mould one from Fimo or Sculpy then bake it, or you can make one from card. I've opted here for the latter. I've made two tapered cones from card that are flattened on one side into a D shape. Place them against the sole of the shoe to check height and fit.
Cut two little D shapes out of card and glue them into the smaller end of the heels.
To increase the strength of the heels I've filled them with glue from a hot glue gun; you could also use an airdrying clay such as Milliput or use Plaster of Paris.
Once firm and dry, coat the outside of the heels in glue then cover with fabric. I've chosen to use more of the same pink brocade that I used for the uppers, but you could also use more of the same leather or pleather used for the sole, depending on preference. Use pegs to hold the facric in place whilst the glue dries.
Here you can see the shoes and the heels drying. I decided to add a diamante buckle and a couple of dusky pink satin ribbon roses to each shoe. After decorating them I then added a touch more glue to the toe and heel areas and clamped them with the clothes pegs before leaving them to dry.
Once the heels are dry, trim the fabric at each end to about 3-4mm beyond the ends. Make short vertical cuts around the top and bottom edges so you can fold the fabric flat against the top and bottom of the heel. Spread glue over the bottom (small) end of one heel, then fold over the flaps against the bottom. Spread a little more glue over the top then press firmly down onto a piece of leather/pleather; this will be the heel cap. Clamp in place with a peg. Do the same with the other heel then leave to dry.
Here Amelie models the almost-complete shoes; all they lack is the heels.
Once the heels are completely dry, trim away the excess leather/pleather around the heel. Now spread glue over the top of the heel and, as before, fold over the fabric flaps to lie flat over the top of the heel. Spread more glue over the flaps then press the heel firmly against the sole of the shoe, placing it carefully so the shoe will balance and the doll be able to stand upright in the shoes.
Repeat for the other shoe then leave to dry; I find the best way to do this is to either set the doll in a stand, wearing the shoes, so the doll's weight downwards will provide the necessary pressure for a good strong bond or, if you don't have a stand, just sit the doll upright on a pile of books or a box, and place a heavy book on his/her knees. Leave for a few hours until the glue has completely dried.
And there you have it - one pair of court shoes for your doll!
These techniques are how actual human shoes are made, with the exception that heeled shoes for humans incorporate a shank (usually steel) into the arch of the sole to provide support to the instep and strengthen the shoe to withstand the rigours and stress of wear and walking. Doll feet don't need support however and doll shoes are not subjected to the same wear and tear so a shank can be safely omitted. Also, instead of shaping against an actual human foot, shoemakers use a wooden form called a "last". When making doll shoes, you can use the doll itself or a spare pair of feet as lasts.